 |
|||
 |
 |
 |
 |
 |
| Manual Shop | ||||
[ Windows 11 Home / Windows 11 Pro ]
デスクトップに「コンピュータ」アイコンを表示する方法
| Windows Mamual |
| Display / Desktop |
| advertisement |
| WEB Site QR Code |
 |
| このマニュアルのほかのウィンドウズ |
| Windows 10 |
| Windows 8.1 |
| Windows 8 |
| Windows 7 |
| Windows Vista |
| Windows XP |
| advertisement |
| English Edition |
 |
| Windows 11 |
| Windows 10 |
| advertisement |
| Spanish Edition |
 |
| Windows 11 |
| Windows 10 |
| advertisement |
| Portugal Edition |
 |
| Windows 11 |
| Windows 10 |
| advertisement |
| French Edition |
 |
| Windows 11 |
| Windows 10 |
| advertisement |
| German Edition |
 |
| Windows 11 |
| Windows 10 |
| advertisement |
[ Windows 11 Home / Windows 11 Pro にもとづいて説明しています。 ]
※ 確認したバージョン : 21H2/22H2/23H2/24H2/25H2
● デスクトップ画面に「コンピューター」アイコンを表示する場合、以下の操作を実行してください。

1. 「スタート」ボタンをクリックます。
![]()
2. スタート画面が表示されましたら、「設定」アイコン をクリックします。

3. 「システム」画面が表示されましたら、「個人用設定」 をクリックします。
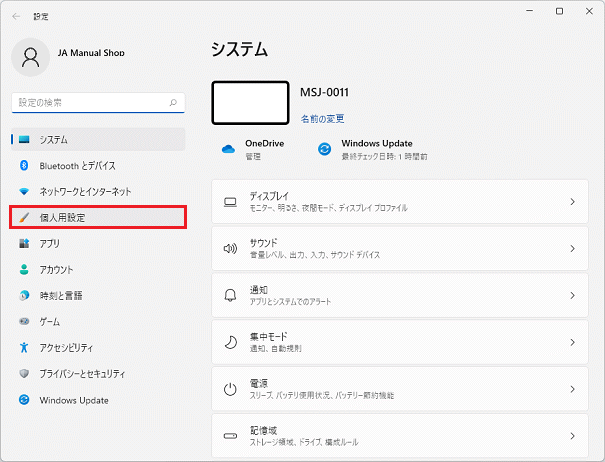
4. 「個人用設定」画面が表示されましたら、上下の「スクロールバー」をクリックしたまま、下側へ画面をスクロールします。
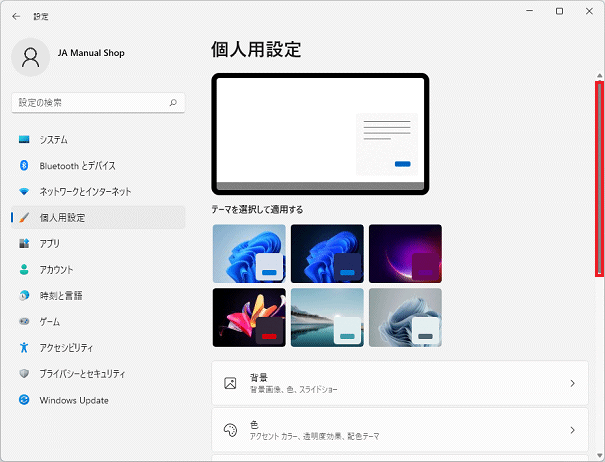
5. 「テーマ」をクリックします。
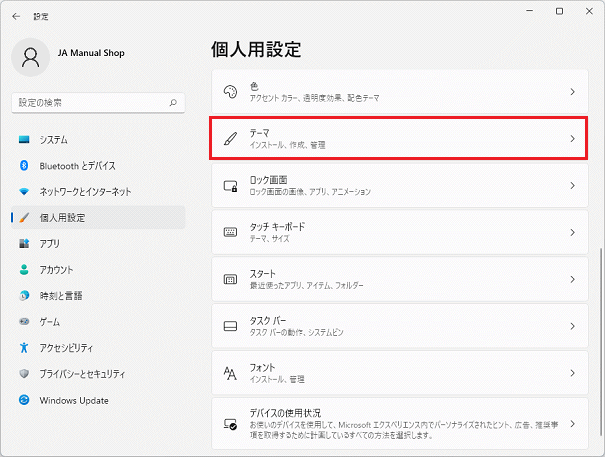
6. 「テーマ」画面が表示されましたら、上下の「スクロールバー」をクリックしたまま、下側へ画面をスクロールします。
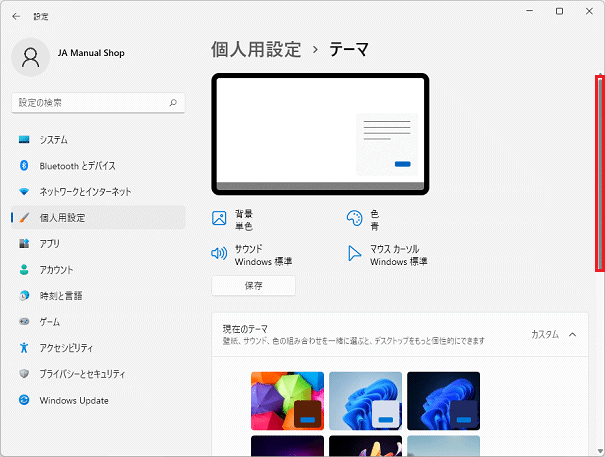
7. 「デスクトップ アイコンの設定」をクリックます。

8. 「コンピュータ(M)」にチェックを入れて、「OK」ボタンをクリックします。
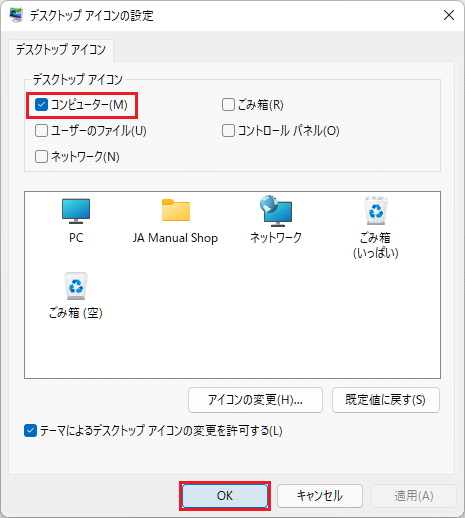
・「デスクトップ アイコン」枠内の設定
・ 「コンピュータ(M)」にチェックを入れます。
9. 「個人用設定」の画面に戻りましたら、「閉じる(×)」ボタンをクリックします。
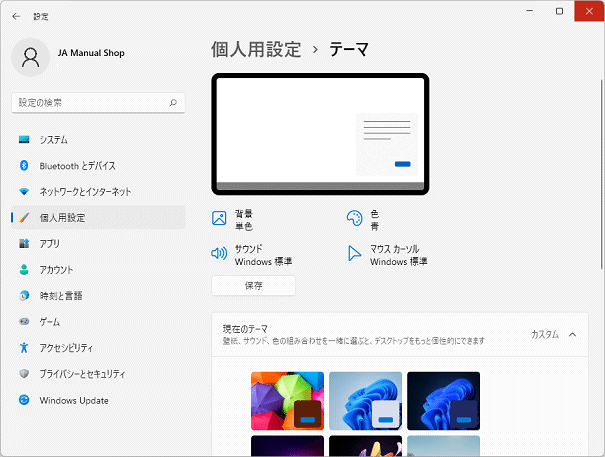
10. デスクトップ アイコン設定の設定で「コンピュータ(M)」にチェックした場合、以下のように表示されます。
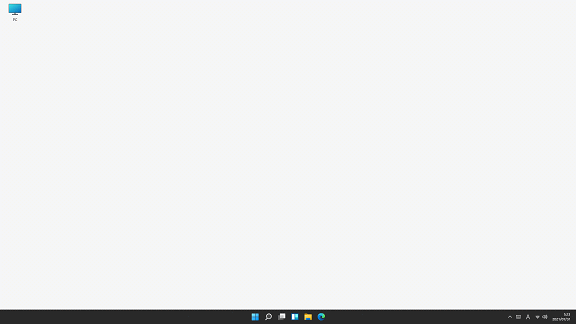
以上が デスクトップに「コンピュータ」アイコンを表示する方法 です。